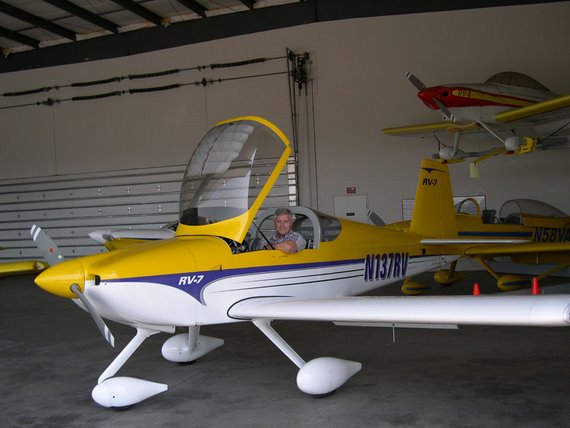
Introduction - N9XG
We're building an RV9A together. The tail number is already reserved and is "N9XG"
It's the biggest project either of us has ever started. We're having a lot of fun and learning many things about airplane construction and about ourselves as well. This site is about the process, and our progress.
We will be updating this from time to time with progress reports. If you can't see enough detail in any of the pictures you can click on them and they will expand (like Magic).

This last week we finished up the horizontal stabilizer. There are two pesky rivets that we need to replace, but this should be simple, since they are easy to get to.
Now we are working on the Rudder. Friday we assembled and match drilled. Now we have deburing, dimpling, riveting, etc.
Well we acquired the Cherry Max rivets and installed them. What a relief to be moving ahead! These are a pull through type of rivet, but they are accepted as a 'Structural' rivet. That's a big deal when it comes to the framework of the plane. These required a slightly larger hole be drilled but that was actually a good thing because all the messing around we had done had left the holes looking a little worn.
Now we're ready to finish attaching the skins to the framework of the horizontal stabilizer. We've been reviewing and re-reviewing to make sure we don't assume our way into a pickle. It's so easy when you think you know just what to do, to rush in and mess it up. We are being very careful to do this right.
Last night we installed some LP4-4 pull through rivets that attach a main rib, a nose rib and the main spar together. We thought about using Cherry Max, but the plans call for LP4-4 which is a non-structural rivet. Didn't make sense to me either. This is the structure... never the less, we are following the directions. Besides we don't the correct size Cherry max rivet (or we probably would have used it).
At the urging of a friend, I decided to go flying yesterday. I hadn't been in the air since my last flight review almost three months ago. So I came early to do my preflight and to make a few trips around the pattern and my obligatory 3 landings.
I guess it just wasn't meant to be though. I first noticed that the fuel was low in the right tank and asked to have them top off the fuel. Then I noticed that there was a piece of the plane missing. I might not have noticed but for the part that had been broken and was still attached. It surrounds the air filter and (I suppose) is at least partially there to keep the filter in place. There were also screws that are meant to attach the air filter. One came off in my hand during examination.
I proceeded with my preflight. Ever since I had a tire blow-out on landing I've paid particular attention to the condition of the tires in my preflight. The right main had no tread. I could see several flat spots where someone must have landed with their feet on the brakes. (NOT GOOD)
The left main had remnants of tread but was noticeably low on air pressure. The nose wheel was the best of the three, but I try to avoid landing on that one...
I scrubbed the flight and reported the defects to the FBO.
Rather than wasting the drive to the airport, I decided to go visit Glacier Aviation. They are a first class operation. I visited with the Mike (the owner) and he directed my attention to his new Light Sport aircraft. I kicked the tires and got in it and made some airplane noises much like the little Rotax engine. He tells me it tops out around 120mph and only burns about 4gph. That's not bad! The Cessna 172 I'm accustomed to flying burns more than twice as much and doesn't go that much faster.
Summary
Although I was disappointed not to fly, I was glad and thankful that I have learned not to take preflight inspection lightly.
When it comes to renting a plane; I think I will only fly Glacier's planes from now on.
Riveting the center nose ribs to the forward spar is turning out to be much more difficult than expected. The two main issues are:
- The angle brackets are in the way and prevent the use of a squeezer to set the long AN470AD4-8 rivets.
- When we've tried to rivet with the gun and bucking bar, we either bend the rivet or put a smiley in the shop head end of the rivet. Neither outcome is acceptable.
We have tried repeatedly using various techniques. We even brought in my friend Joe who used to work as an A&P on B52's and for Soloy. He finally suggested Cherry Max rivets. So I did some research and they look like the ticket. All I need to do now is find the supplier and the proper tool for installing them. Stay tuned.
Well, you get the idea. Last weekend I finished the match drilling and the deburing of the many holes in the horizontal stabilizer. Monday (Aug 13) I countersunk the attachment points in the HS spars where the skin attaches to the spar. I didn't like doing it. The pneumatic squeezer could have dimpled those holes in 15 minutes. I spent about 2 hours countersinking...
Wednesday (Aug 15) we assembled the doublers and spars. Took inventory of necessary rivets.
We also were waiting on a couple of parts we ordered from Vans. They arrived the very next day.
Discovered a way to salvage rattle cans that clog. We soaked the nozzle in acetone and put a few drops of acetone in the top of the can. Then let it set for awhile. Worked pretty good.
Last night I fitted the Left skin to the HS and match drilled both Left and Right skins. My clecoe hand got a tendonitis work out, but now we can move on to deburring. Yahoo!
Last night we finished match drilling the ribs and spars of the Horizontal Stabilizer (HS). We moved on to test fit and clecoed the right skin to the HS. It is looking good.
The Process
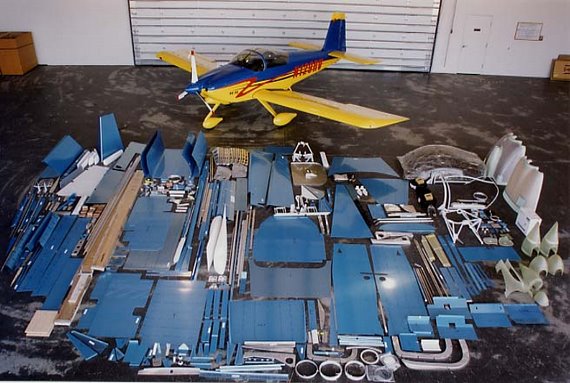
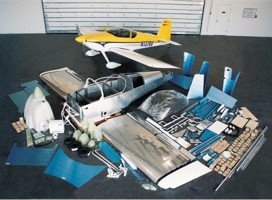
Most of us think of the airframe as the main thing, and I suppose it is; since you can't fly without it. The kits that Vans sells are match hole punched. That means that the holes are already located and punched when you get them. This saves a lot of time as you can imagine. So what follows is what you do once you've unpacked and inventoried the parts from the factory.
There are several thousands of these planes flying. Rather than making mistakes first-hand, I recommend looking at the web sites of builders who have already done this. Some of my favorite links are provided. You should also look at Van's 'Links' page for the model you're building.
Before touching the parts, it is advisable to read the instructions and review the drawings until you have a clear idea what needs to happen and what sequence it needs to happen in. The drawings are invaluable.
Each sub assembly requires the same basic process:
1. Prepare the parts for fitting. This entails cleaning, filing, and finally scotchbrighting. In addition, some parts require fabrication and/or machining.
2. Fitting is done numerous times. The pre-punched holes are matched to the corresponding part(s) and are held together with clecos.
3. Match drilling is done in assembly to provide optimum fit.
4. Once the holes are match drilled to the proper sizes, the part is disassembled and deburred to remove any sharp edges and irregularities that might result in a poor fit or the development of a crack.
5. Rivets that will be flush with the skin require either a dimple or countersinking. This is normally obvious, but sometimes the rivet needs to be flush and it's not clear at first glance just why.
6. At this point, a coat of primer and (in some cases) paint is applied protect the metal from corrosion. We've decided to prime and paint all skeletal parts; i.e. Spars, Ribs, etc. Skins will be primed where they connect. The method to our madness is this; we want defects to appear first in the skin where they are easiest to fix and pose less of a threat.
7. This is a dangerous part of the process because you might want to rivet something. But WAIT! Review the plans and the directions again.
8. Okay, so you've reviewed the plans and the parts are ready to assemble. Double and triple check the plans to ensure that the proper rivets are used. It's easy to mess this up or get out of sequence.
Rivets and Riveting
There are thousands of rivets that hold the plane together. Since this is an important task, let's talk a bit about them.
The rivets we'll be using are made of aluminium and are set in one of several ways; Hammering, Squeezing, Pull through.
Hammering a rivet is best done with a partner. One person operates the rivet gun and the other holds a bucking bar on the back side to create a shop head. I've tried doing this alone and almost always with undesirable results. The idea is for the shop head to be approx 1.5 times the diameter of the shank of the rivet.
Squeezing a rivet requires a special tool and is my preferred way whenever possible. Some folks use a manual squeezer, but I like pneumatic squeezer. They develop approx 3,000 pounds of force in the last 1/8th inch of the piston's travel. So proper adjustment is important. Once adjusted properly it will deliver consistent rivet sets.
Pull through (aka Blind or Pop) rivets are for those applications where there is no way to get access to the back side of the rivet. In general this type of rivet has inferior strength characteristics compared to a solid rivet. The noteworthy exception is the Cherry Max rivet. It is a pull through rivet, but it is also structurally rated and not cheap.
Removal
When rivets are set badly (as is sometimes the case) You need to decide if it's so bad that it just has to be replaced or is it okay as is. The main concern is to remove the offending rivet without doing damage to the hole it's in; e.g. enlarging or elongating or both.
If it just doesn't pass muster, get a drill bit about the diameter of the rivet shaft or smaller. Center punch the head of the rivet (solid rivets only) and then carefully drill thru the head just down to where the shaft meets the hole. Once this is done, insert and old drill bit into the hole and wiggle the head until it snaps off. Once the head is off you should be able to push it out with a punch.
With pull through rivets this can be problematic, as the shaft is most likely steel and may turn with the drill bit. Another problem with removing blind rivets is this. Blind rivets are used because access to the back side is either difficult or impossible. Onc you commit to removing the blind rivet, you have to figure out how to remove the back side when you punch it thru the hole.